- Install PopKit on your WooCommerce website
- Get Data with Webhooks
1) Install PopKit on your WooCommerce website
Let's suppose that you have already created an account on Popkit. The first step is to get your Pixel Code.

Now, go back to your wordpress page, download the plugin (if not already done) "Insert Headers and Footers". The plugin lets you insert our code in the header of your site. You can paste the Pixel Code inside the header of your website.
It's Done, you can now see your notifications on your site.
2) Send Data to PopKit with Webhooks
Let's suppose that you have installed Popkit on your website and that you now want to track the conversions of your products. Either you use a form and you can check "Auto-Capture Data" then the conversions will be sent automatically.
Either you use the Webhooks on a product page.
The first step is to create a notification on PopkitWebhook (Go to WooCommerce > Settings > Advanced > Webhooks)
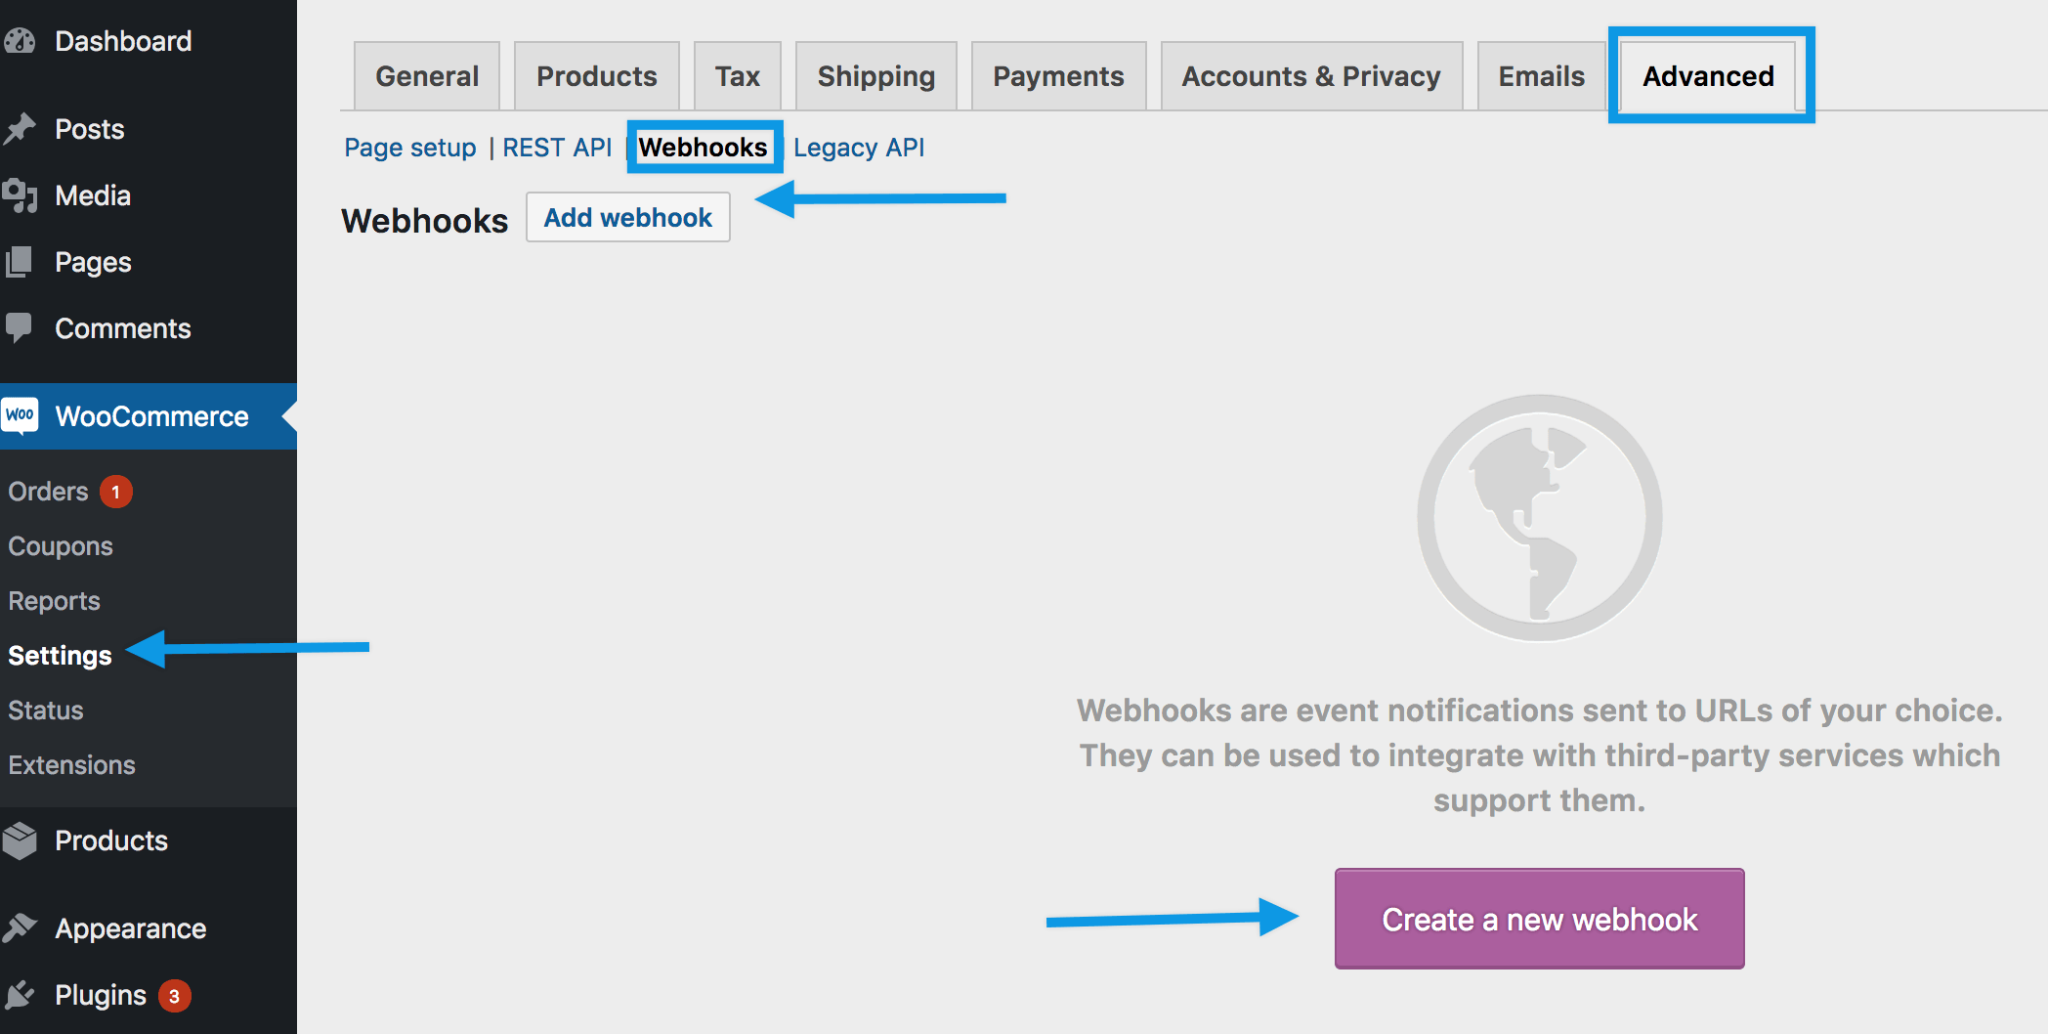
You can select Create a new webhook (first incident) or Add webhook. The Webhook Data box appears.
In the "Delivery Url": URL where the Webhook payload is delivered (ex: https://app.popkit.club/pixel-webhook/fa6b0199Ha46e73c2c3a18917383a97e)
Save Webhook
Note: The first time your webhook is saved with the Activated status, it sends a ping to the Delivery URL.
Done.


